Faith, Fun, Fashion, & Family

Faith, Fun, Fashion, & Family
Showing posts with label fun. Show all posts

Monday, June 17, 2013

D.I.Y. Pillow Pal


Hey, are you dreading LONG CAR RIDES with your kids this Summer Vacations? 
Do they tend to be a "pain in the NECK?"
Well, make a neck pillow for your kids to encourage car napping.


Ok, I got this idea the day of my oldest daughter's dance recital. 
The location of this grand event was an hour away. 
She had been using her Pillow Pal dog that she has had since she was born on the long ride there.
She wanted to bring it in to the recital as well since we would be there for an extended period of time. 
Well, of course... it was left behind and we did not notice it till we were almost home. 
I refused to turn around and told her we would find another way to get it back or I could just buy her a new on or even better... MAKE HER ONE!
Everyone loves stuff made from their mommy, right?
I think I was more excited about this than she was and my mind just went on a creative adventure the rest of the drive home while she cried in the back seat the remainder of the ride 
I am pretty sure the tears of hers were fake, she can be a little ... who am I kidding, A LOT dramatic. 
Gotta love her.
Well, we ended up getting it back from the dance teacher who found it and figured it was one of her dancers.
Thank you Koni. But, I still really wanted to make one... or two... and maybe one for my husband.. 
and ME TOO!


NOTE: FYI, I am not a professional sewer and do not know terms of sewing. I also do not use a sewing machine. I have one, it is just that I do not have a sewing maid or mommy to come along and fix it when the sewing machine gets all in a hissy and makes me aggravated. SO, I would rather sew by hand. Okay?

I started off by taking a cheap pillow form we had laying around the house and traced it to the back side of the fabric I wanted. I then cut it our leaving about 1/2 inch around for the extra so it would not fray. 


I then traced the pattern from piece 1 to another piece of fabric that was silky. 
My daughter loves silky fabric so I thought it would be fitting. 
You do not have to use apposing print or texture at all on yours. I just felt like mixing it up a little.


I cut out the patter with pinking sheers just to be a little safer and avoid excess fraying.
I then used safety pins... well, cause they are safe.
The entire time I had little feet and fingers helping me, dancing around me, and siting on my stuff. 
So. I like the safety pins better. THey are safer for me too.

I then did a running stitch (I do know that term, Yay!) from the inside cure and stopped before I got to it again about 4 inches apart. 
Leave this un-sewn gap for stuffing...

THen turn the pillow form right side out for stuffing...


I use polyfil. Make sure to follow instructions and use small pieces and pull them apart some before you stuff. THis keeps if fluffier and you use less.

Stuff... Stuff... Keep stuffing...

Sew up the hole that was left after stuffing pillow.
You could leave it plain.. but then it would just be a pillow, not a pillow PAL!
We all need a pal.

DECORATE!
Make your pall come to life.
I had alot of help on this part. 
As soon as I pulled out a big glass jar of buttons...
here comes the girls wanting to help mommy.
FUn FuN FUn!!1 


I went ahead and crocheted some ears and a nose and collected some buttons for  a kitty cat.
That would be a whole another lesson I am not talented enough to teach. 
I can crochet stuff creatively, 
see here
but I have yet to write out instructions. 
I usually just make up the rules as I go along. I was never really "taught", I just learned the basic and went from there by trial and error. 
I do not learn much by reading, so I am not sure if others would get it if I tired anyways.

BUTTON PARTY!!!
My littlest girl Madelynn is 2...


My oldest girl Maisy 
(the drama queen who inspired this idea) is 6.


Here is the finished pillow pal #1. 
I am in the process of # 2...
and hope to make more. 


THis is the perfect time to make one since it is SUmmer and a lot of kids will be taking 
Family Vacations which are notorious for LONG CAR RIDES!
We all know who likes kid naps the most...
YEAHHHH!
Have  a great summer...
God Bless!

Friday, April 12, 2013

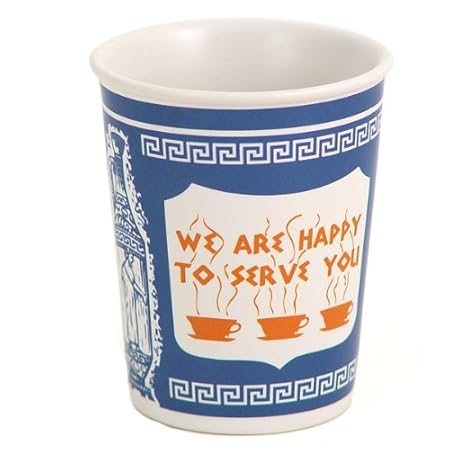
Clouds in my Coffee... obsession with marvelous mugs!

I am not sure when, but somewhere in my adulthood I became obsessed with unique coffee cups.
My coffee time has become very important to me as a mother.
It is just that...MY coffee TIME!
It is time to be away from the kids, the noise, the crying, and the world 
and just disappear into relaxation and meditation.


COFFEE POEM
by Tabitha Seaton

It is the first thing I think about when I wake up.
This is the time I pick out my favorite cup.
I pick the cup that sets the mood for the day.
I don't want a set, I want an array.
It is a time for me to be alone in the midst of the daybreak
I slowly nurse my cup enjoying each sip I take.
I feel the creamy sweetness go down
while a smile of comfort is born from a frown.
I put on my face and curl up my hair
lifting my voice in a dawn prayer.
The clouds in my coffee go up with my voice
carried away to my idol of choice.
Spending time with my Father in the morning so still, 
I awoke so empty and He begins to fill.
I sip and I talk with Him about my concerns
as each drop of coffee down my through softly burns.
I drink away my mug till the last drop is gone
starting my way to a new dawn.
I started it off right with my cup and my Maker, 
 When my morning was shaky, He was the breaker.
This will be a good day ahead of me
as I look at my beautiful mug happily.
________________________________________________

Hold you applause please and continue reading...
I want more mugs!
Yes, every store I enter that may have a mug
I set my eyes for the prize.
It has to have that certain flair that make this girl smile. 
I don't want it to be super silly in a cheap comedy way, NO NO...
That's not me.
I want it to just be beautiful or be unique.
I like them to have a story or spark a memory of mine from the past...
The mug just has to do something other than be a vessel for my drink.


Here are some mugs that I would like to own one day...
Matryoshka Teapot

See more on my Pinterest!


I do not want to drink from the same mug everyday!
How boring is that!?
I like to pick a size, shape, color, form, or whatever to set my day in the right direction.
These are some mugs I currently possess that I love...


Large Owl mug- Peir 1 Imports
Children's Cow mug- Canton Tradedays
Retro Flower mug- Target
Stein mug- Uniques and Antiques of Mineola
Apple Mug (seen below as well)- Cracker Barrel
WOoden Giraffe mug- from my friend Cara on her Africa trip
HillBilly mug- Antique store in Tomball, Texas
Maw Mug- lost track...


My New French Provincial Mug from Target


                                                                     Maw and Pa Mugs

I want to thank my talented photographer, Shannon Seaton, 
 for always putting up with my hair brain photo ideas.
I know he is totally and continually annoyed, but does it cause he loves me.
Right honey?....


PS. I love me some flavored cream. When it comes to coffee, it's the only way I go. 
A little coffee with my cream!
See what I started doing with my creamer bottles when I am done...

Blessed Blogging!


Thursday, February 7, 2013

Randsome Style Tee DIY


This idea is from the Thrift Secrets journal I have been writing
under the UpCycle ideas...
http://thelostsocklife.blogspot.com/2013/01/the-art-of-smart-thrifting.html
I have made these before, but thought I would do a little more playing...


I used to have a group of women that would meet and Create For our Creator..,
We had fun making these shirts and all pitching in and bringing old tees with letters. 
Now, I play on making them with my afterschool art group of middle schoolers called Art With A Purpose. 
We are not a big named group like FCA, so we are just going to create our own humble tees for our group. 
I made another one below...
Art Geek, Jesus Freak!


Front Side 

Back Side...

Have fun on your own!

Thursday, January 10, 2013

DIY Accessory Lamp


Ok, this whole idea was inspired by a wire trashcan... go figure.
I bought one originally for my daughter to use for $1 at the Dollar General. 
As I held it in the car on the way home from the store, my brain started going crazy with ideas.... 
I have these felt flower broaches and hairpins that I make like crazy to match almost every outfit I have. 
The first one I made and wore I felt crazy, now without one I feel nakedly not myself!
So, they are beginning to avalanche off of this torso I keep them on by my vanity.
So, this metal mesh trashcan gave me a better idea.


The holes were perfect for pinning my felt flowers to. But how dorky would that be to pin them to a trashcan?
So, What if I turned it in to a lamp... creative light bulbs now going off literally and figuratively! 
So, I went to get a plan lampshade (just for the hardware at top), a lamp base, spray paint, and a light bulb. 
The best place I thought would be Goodwill!
But, they did not have what I needed (hopefully you may have better luck),
so i went back to the Dollar $tore.
All necassary supplies were on hand now, so...

First...
I ripped the paper off lampshade and hot glued the metal ring for the bulb into place.


I considered using it as a fashion forward hat... but soon changed my mind when my 15 month old laughed from her high chair...


Next, I took it outdoors to spray paint white. 


After paint was dry, I  attached it to the lamp stand and screwed in light bulb.
I thought it looked pretty cool left just like this.
But, it was not what I intended it for. 


I put all my felt flowers on the mesh and hung my earrings from the bottom!
It takes up a lot less space and gives me light to do my makeup...


I am absolutely in love with this idea!
Hope you enjoyed my DIY Accessory Lamp...